Technical Resources
Educational Resources
APM Integrated Experience
Connect with Us
Express.js is one of the most popular web frameworks for Node.js. It allows you to build APIs and other web applications quickly and effortlessly. But building a server is only half the battle—the other half is maintaining it. To have a good understanding of what’s happening to your application, you need to read the logs. But logging can be painful (as in digging through thousands of not-really-important log entries looking for one line with an actual relevant error message) if not taken care of properly. Building a web server with Node.js can be done the hard way or the easy way (Express.js). The same applies for logging in Express.js, which can be also done the hard way or the easy way (using morgan).
In this post, you’ll learn what morgan is, how to use it with Express.js, and what benefits it brings.
First things first, let’s quickly discuss how Node.js, Express.js, and morgan relate to each other. As you may know, Express.js is a Node.js module designed to simplify the creation of web servers and APIs. You can build an API using an HTTP module built into Node.js, but Express.js makes it easier and quicker. Morgan does the same for logging. It’s an easy-to-use yet powerful logging middleware for Node.js. You can use it together with Express.js to not only build APIs but easily maintain them. Fun fact: the name originates from Dexter Morgan.

In one sentence, morgan simplifies the task of logging HTTP requests to and from your application. What does this mean? Normally (without morgan), developers need to manually create all the logging logic. They need to instruct Node.js/Express.js what, how, and where to save. Morgan does this for you. It collects logs from your server and makes them ready to read. It also comes with a few built-in, predefined presets, saving you the time and effort of setting up all the logging yourself. It can be extremely helpful when bootstrapping a new project, but it’s also powerful, so it’s perfectly fine for bigger applications as well.
You can install morgan the same as any other Node.js module—with NPM:
npm install morganNext, you need to instruct Node.js to include morgan in your application:
const morgan = require('morgan');That’s it for the basics. Morgan is now installed and ready to be used. In the previous section, I mentioned morgan comes with a few predefined presets. Let’s use one of them now, and later I’ll explain how to create your own.
To use morgan with Express.js, you only need this line of code:
app.use(morgan('tiny'));The above line instructs Node.js to use morgan with one of its predefined presets called “tiny” (which, as the name suggests, provides simple logging without too much information in the logs). The full sample application will look like this:
const express = require('express');

const morgan = require('morgan');


const app = express();

app.use(morgan('tiny'));


app.listen(8080, () => {

  console.log('Server listening on port :8080');

});
As you can see, you only need to add two lines of code to the application to use morgan. If you run the above code and send an HTTP request to port 8080, you’ll immediately see the logs provided by morgan:
Server listening on port :8080

GET / 404 1.616 ms - 139
By changing “tiny” to “common,” you can get a standard Apache common log output format, which is widely used and accepted by all sorts of log management systems:
Server listening on port :8080

::ffff:127.0.0.1 - - [22/Aug/2020:17:07:31 +0000] "GET / HTTP/1.1" 404 139
You can see the list of all predefined presets here, but you’re not limited to them. In fact, you’re free to create your own custom formats, too. There are two ways to do this. Option one is to use predefined methods (called “tokens” in morgan). They’re easy to understand and provide you with a way to quickly create a custom log format. Let me give you an example. Assuming you only want to log an HTTP method used, a URL that was called, and an HTTP response status, you can use :method :url :status in place of the predefined preset name. Your code would look like this:
app.use(morgan(':method :url :status '));This will give you simple-looking logs:
Server listening on port :8080

GET / 200
If you now want to also see response time and HTTP version, you can add :response-time and :http-version to your custom morgan definition:
app.use(morgan(':method :url :status :http-version :response-time '));You get the point, right? You can check the list of all predefined tokens here.
Another option is to create your own custom tokens and logging format. Morgan can access all the information from an HTTP request and response. This means even if your application is using some custom HTTP headers, you can still use morgan to log them. All you need to do is first define your own token and use it for your log format. To create a custom token, you need to invoke morgan.token() and pass the name and a callback function to it. The callback function needs to be called with two arguments, req and res (which represent HTTP request and HTTP response, respectively), and it should return a string value.
Let’s say your application is creating a custom HTTP header “user-type” and you want to include the value of this header in your logs. To do this, you need to do the following:
morgan.token('user-type', function (req, res) { return req.headers['user-type'] })The above line creates a new custom token, which you can then use by adding :user-type (defined as the first parameter in the code above) to your morgan log format:
app.use(morgan(':method :url :status :user-type'));And voilà:
Server listening on port :8080

GET / 200 adminMorgan drastically simplifies logging for your Express.js applications, and it’s a powerful tool, allowing you to build custom logging formats. You can use morgan for small projects when you need quick and simple logging as well as for bigger applications when you need custom solutions. In this post, we covered how to install morgan, how to use built-in presets, and how to create your own. In most cases, you’ll only need to add two or three lines of code to start using morgan. If you want to see how it compares to other libraries, I recommend you read this blog post.
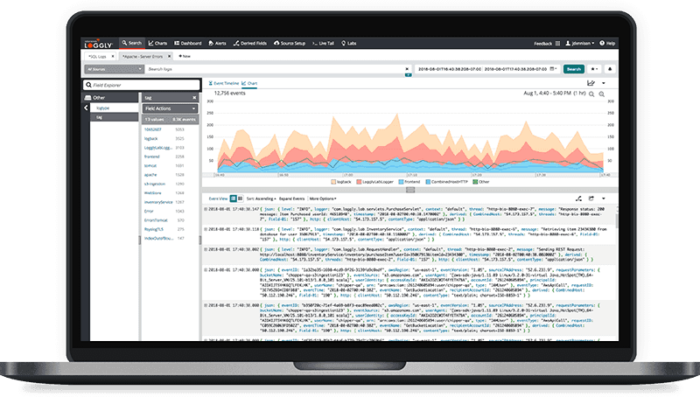
You may wonder, what now? What am I going to do with all these logs? The answer is ship them to a log management tool—a tool designed to receive all these logs and perform analysis and monitoring for you. It’ll aggregate the logs, group them, and show you important information on a dashboard. It’s worth mentioning here that morgan only takes care of producing logs for you. If you’d like to send these logs to a log management tool, you need another module. You can read here how to do it with the popular library Winston. Going back to log management tools, one such tool is SolarWinds® Loggly®. On top of basic log management, Loggly has many extra features to help you get a good overview of what’s happening with your application. You can sign up for a free trial here.
This post was written by Dawid Ziolkowski. Dawid has 10 years of experience as a network/system engineer with DevOps experience in between, and he’s recently worked as a cloud-native Engineer. He’s worked for an IT outsourcing company, a research institute, a telco, a hosting company, and a consultancy company, so he’s gathered a lot of knowledge from different perspectives. Nowadays, he’s helping companies move to cloud and/or redesign their infrastructure for a more cloud-native