Technical Resources
Educational Resources
APM Integrated Experience
Connect with Us
Kubernetes helps you simplify and automate infrastructure operations, but it’s a pretty complicated tool on its own. It’s a distributed system consisting of many components. To truly understand what’s happening under the hood, you need to gather log messages and metrics from all these components. On top of this, you have the applications running on your Kubernetes cluster, which also produce logs and metrics. You need a well-designed monitoring solution to gather and understand all these different data sources. For basic debugging or quick troubleshooting, however, Kubernetes offers its own built-in “monitoring solution.” With the help of kubectl, you can read logs and see basic metrics. In this post, you’ll learn how to use these basic Kubernetes monitoring solutions.
Before we dive into Kubernetes logging, metrics, and monitoring, let’s talk about kubectl. What is it, and why are we starting with it? If you’ve used Kubernetes before, you probably already know kubectl is basically a Kubernetes command-line tool. It’s used to control/operate your Kubernetes cluster. While there are a few GUI tools for Kubernetes, kubectl is the most common way of interacting with a Kubernetes cluster. It’s important because it allows you to read logs from containers and see basic usage metrics, but more on this later in the post. If you don’t have it yet, you can follow installation instructions here.
The importance of logs and metrics is clear, right? We need them pretty much all the time for various reasons—to keep track of what our application is doing or to keep track of sales, new users, new requests, etc. And we need them for troubleshooting; whenever something goes wrong or our application crashes, we check the logs. Metrics are essential in helping us know when to scale our cluster or to find out which part of our system is having an issue. Now that we understand logs and metrics in general, let’s talk about logs and metrics specifically in Kubernetes. How do they work in Kubernetes, where do they come from, and how can you see them?
No matter whether you’re an application developer or a Kubernetes operator, your workflow will be similar:
1. Prepare an application (write the application code if you’re a developer or prepare application configuration if you’re an operator)
2. Write or change Kubernetes YAML definition files
3. Deploy these YAML files
4. Observe whether the application was deployed properly and how it behaves
5. If you spot any issues, repeat the whole process
We’ll focus on step four here. How do you observe what the application is doing? In the case of Kubernetes, the first step would be to see the status of the deployment, but this only gives you a “good/no good” indication. To actually understand what an application is doing, you need to read its logs. How do you do that? It’s as simple as this:
kubectl logs [pod_name]The above command will show you the logs of the application running in the container. By default, the application will log to STDOUT and STDERR inside the container. Then, kubectl logs will show you the output of these two streams. Here’s the first thing to keep in mind: if you don’t see any logs after executing kubectl logs, check whether your application is writing to STDOUT. Some applications may not. If this is the case, you have two options. You either need to make it write to STDOUT (if possible—for example, via configuration change) or you can use the sidecar container approach. Sidecar is a secondary container that runs in the same pod as your application, reads its logs from the file, and streams to STDOUT.
You now know how the kubectl logs command works and how to use it. Let’s dive into it a bit more. So far, you’ve learned only the basic usage. But the kubectl logs command has a few helpful options.
In a Kubernetes world, it’s pretty normal for pods to be destroyed and recreated. It’s part of the Kubernetes job to kill a container when it reaches the resource limits, for example. But what about when your pod occasionally restarts and you want to know why? Well, kubectl logs will only show you the logs from a running container. But you can add –previous to the kubectl logs command to see the logs from a previously running container. It’s a useful command for debugging purposes.
Another useful option is adding –follow. This allows you to stream the logs in real time from the running container. You might use this when you’re live dubbing some issue or want to see what happens in the application when you’re using it. Instead of constantly executing kubectl logs, you can run kubectl logs [pod_name] –follow to get a live stream of logs.
Arguably, metrics are just as important as logs. Depending on the situation, you may find the root cause of an issue faster with metrics than with logs. But they serve a different purpose, too. How many nodes should you have in your cluster? Is your node CPU/RAM ratio optimal? Which pod is using the most memory? You can easily answer these questions with metrics.
In Kubernetes, you can get two basic sets of metrics out of kubectl: one for pods and one for nodes. To see CPU and RAM usage for pods, you can execute kubectl top pods. To see CPU and RAM usage for nodes, you can use kubectl top nodes. These simple commands allow you to get a basic but quick overview of your resource consumption.
At this point, you should understand the most basic way of getting logs and metrics from your Kubernetes cluster. Now, let’s discuss how to proceed if you want something more advanced. The kubectl logs and kubectl top commands are useful, but to understand complex problems and get a more long-term overview of your cluster, you need a proper monitoring solution. The most beneficial solution you can implement is a centralized logging solution.
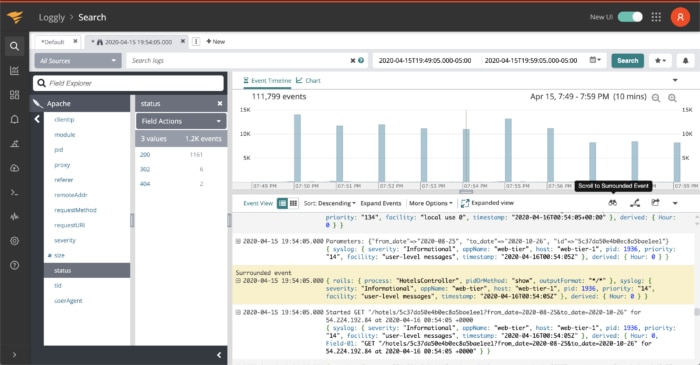
Shipping all the logs from the cluster into a separate tool dedicated to log processing and analysis offers many benefits. Earlier, we talked about using kubectl logs –previous to get logs from a previously running container. But what if you want to get the logs from five versions before? With a centralized logging tool, you have access to all the logs. This is only one example of the many benefits of centralized logging. If you try SolarWinds® Loggly®, for instance, you’ll also get anomaly detection, the ability to compare logs from different containers, the ability to correlate logs with infrastructure metrics, and more. These are all features capable of drastically improving your troubleshooting and even decreasing the number of outages.
The true power of logs and metrics can be unleashed when combining them into one monitoring solution. Do you see a sudden spike in CPU usage? Compare it with log entries from the same time period. Do you see a drop in the active users metric? Compare it with logs to see if there are any errors. Is your cluster upscaling due to the higher load? Compare it with logs and use anomaly detection to understand whether it’s a result of your latest promotion or a DDoS attack. All these powerful insights are possible when you make the most of your logs and metrics and compare all possible data sources. You can do this by integrating Loggly with SolarWinds AppOptics™, and you can read more about the integration in this post.
If you decide to implement a centralized logging solution for your cluster, you’ll also need a logging agent to forward your logs to your logging server. rKubeLog is the easiest way to get logs out of your K8s cluster. Learn more here.
In this post, you learned about kubectl logs and kubectl top, two common and helpful Kubernetes CLI commands. We also covered the concept of centralized logging solutions, and we briefly talked about taking your troubleshooting efforts to the next level by combining all the data into one logging/monitoring system. Remember, logging is crucial for solving and avoiding problems. Less downtime means happier users. If you want to make your users happier, sign up here for a Loggly account and see for yourself how it can help you.
This post was written by Dawid Ziolkowski. Dawid has 10 years of experience as a network/system engineer, has worked in DevOps, and has recently worked as a cloud-native engineer. He’s worked for an IT outsourcing company, a research institute, a telco, a hosting company, and a consultancy company, so he’s gathered a lot of knowledge from different perspectives. Nowadays, he’s helping companies move to the cloud and/or redesign their infrastructure for a more cloud-native approach.